When scientist and author Jack Challoner was a kid, he asked a lot of questions: What is air made of? Why is glass transparent? Why does sugar dissolve in water? He spent summers in his family’s garden doing science experiments to find the answers. Sometimes, he made up his own experiments. Other times, he used experiments he found in books.
Decades later, Challoner is helping a new generation of kid scientists follow in his footsteps. He’s the author of Maker Lab: Outdoors, a book of 25 fun science activities designed to be done outside. “The summer, when you’re outdoors, is a great time to explore how things work,” Challoner told TIME for Kids.
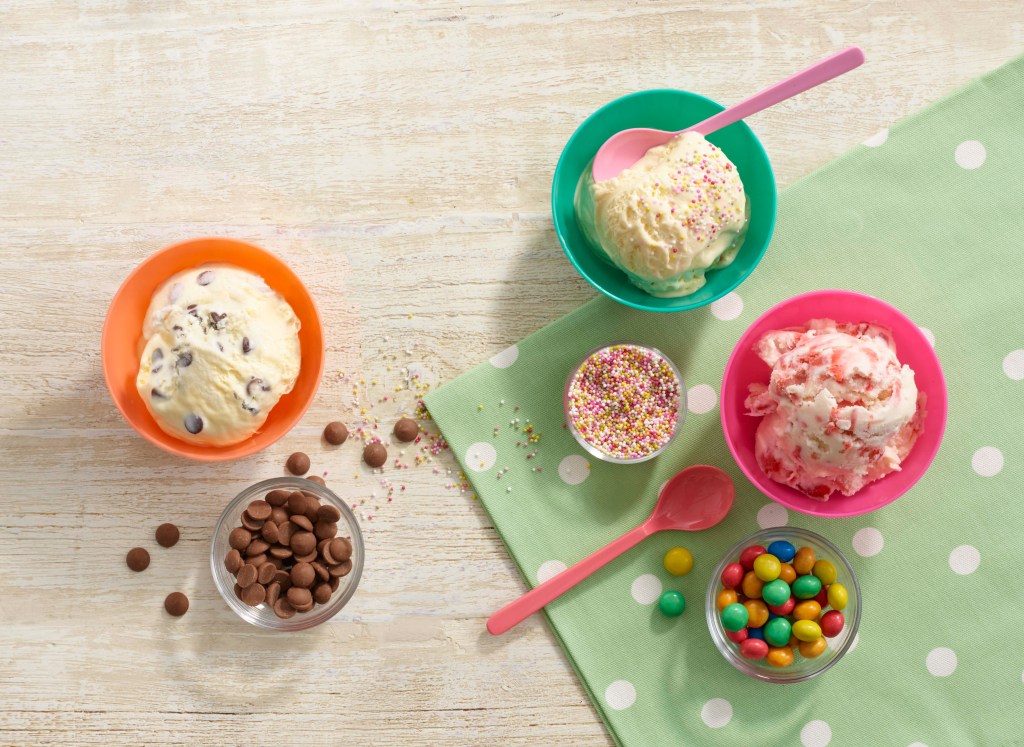
Challoner shared one activity from the book with TFK readers. Below, you’ll find his instructions on how to make ice cream. Challoner says this activity is one of his favorites, because making ice cream teaches you about important scientific principles.
Ice cream is a type of substance called a colloid. That is a mixture of solids, liquid, and gas. The solid particles in ice cream are ice crystals. They keep the ice cream cold. Milk fats, which are liquids, make it creamy. Ice cream also includes tiny air bubbles, which are gasses. They enter the mixture when it is shaken.
On top of the interesting science explored in this activity, Challoner says there’s one very important reason it’s worth doing: “You get to eat something at the end of it.”
What You Need
1/4 cup (50 g) sugar
3/4 cup (180 ml) heavy cream
3/4 cup (180 ml) milk
A dash of vanilla extract
1¼ cups (150 g) rock salt or ice-cream salt (available at most grocery stores)
One large ziplock plastic bag
Two small ziplock plastic bags
Two dish towels
A big bowl of ice
Instructions
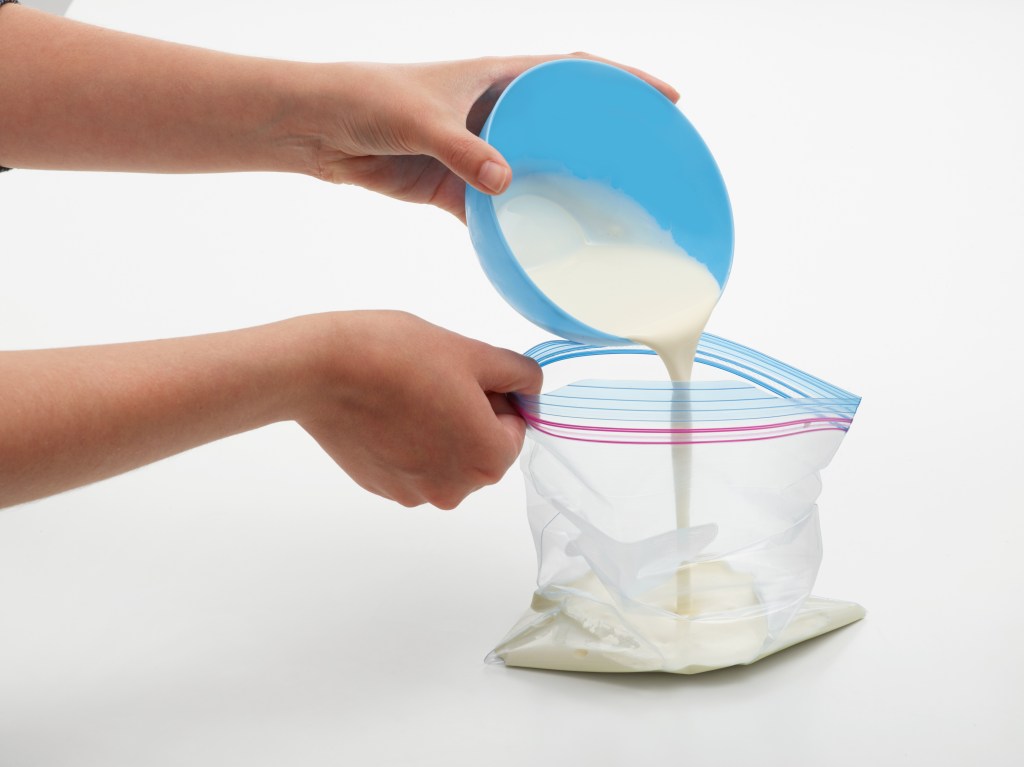
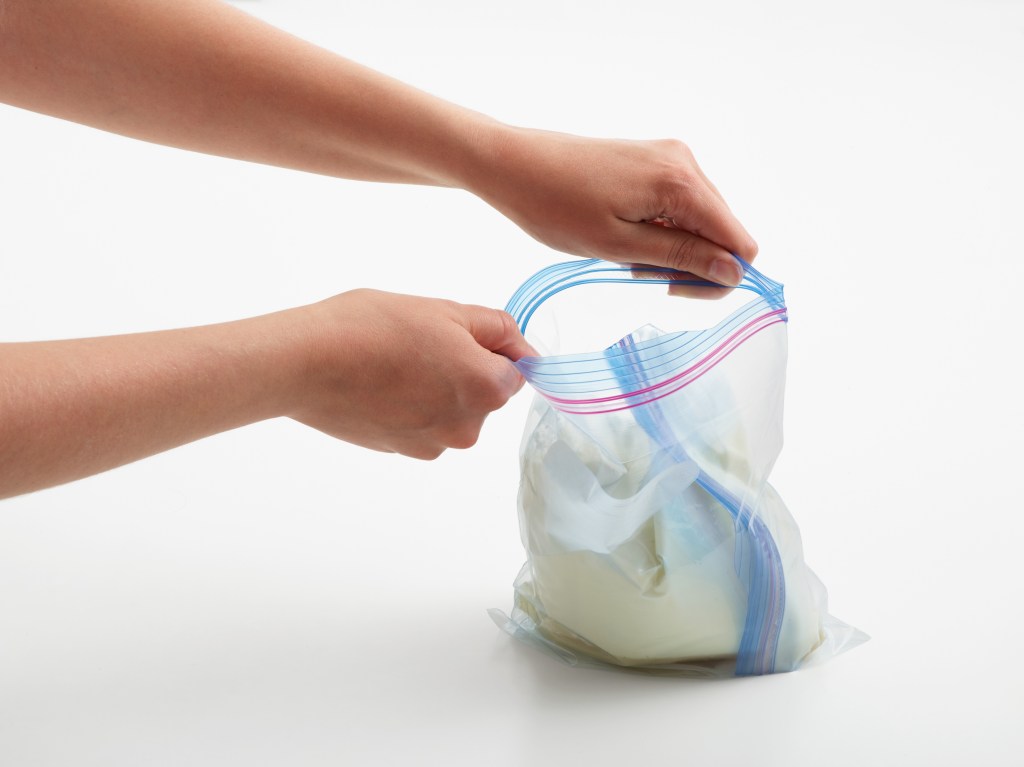
1. Hold open one of the small ziplock bags and pour the heavy cream into it. Cream is made of water, with droplets, or globules, of fat mixed in.
2. Pour the milk into the same bag. Like cream, milk is mostly water, and it has fewer globules of fat than cream.

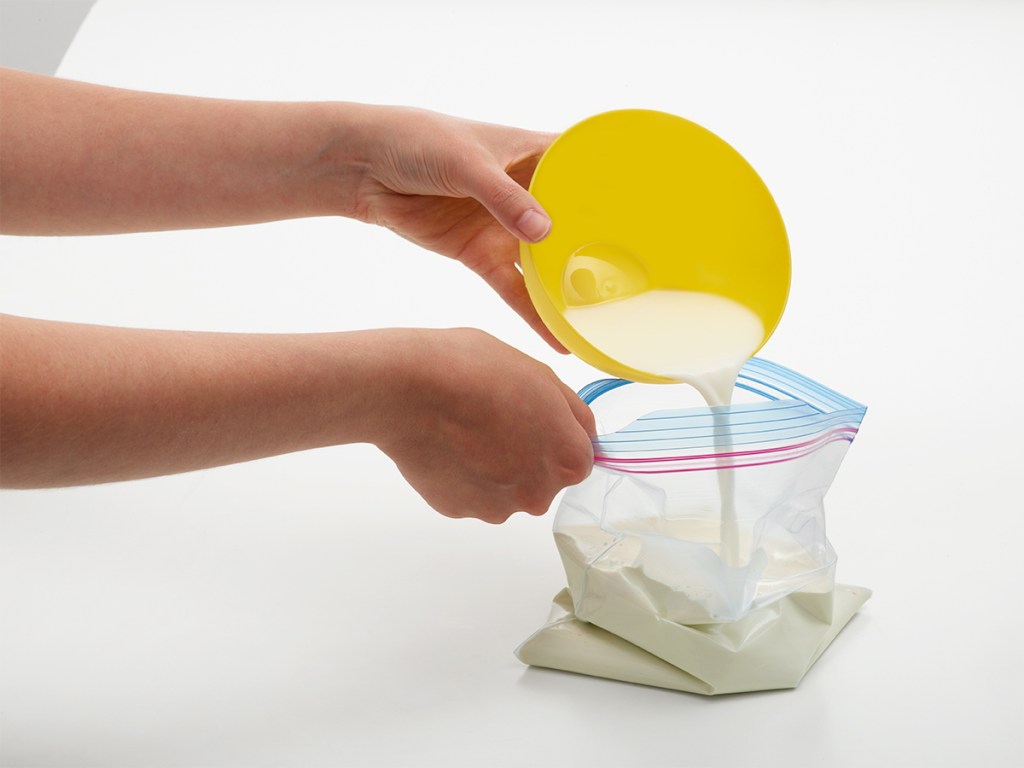
3. To make your ice cream taste sweet, add the sugar. The sugar keeps the ice crystals that form in the mixture from getting too big.
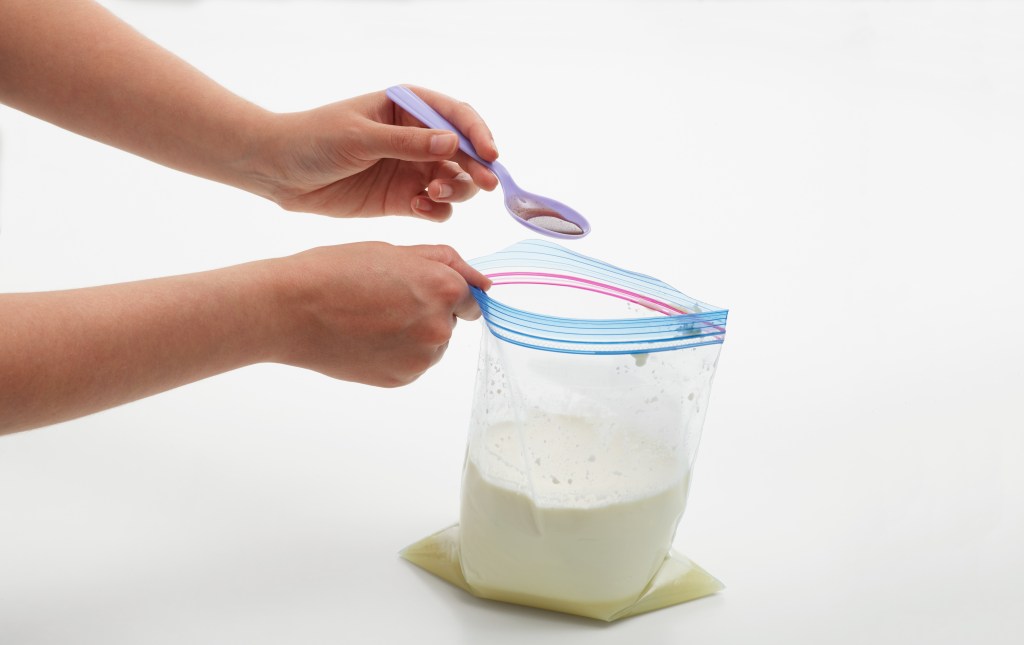
4. The final ingredient is a dash of vanilla extract. You don’t need to stir the bag’s contents, but be sure to squeeze the air gently from the bag before sealing it securely.
5. Place the bag containing the ingredients in the second small bag. Protecting the ice cream mixture inside an extra bag ensures that it won’t mix with any of the ice and salt you’ll use next.
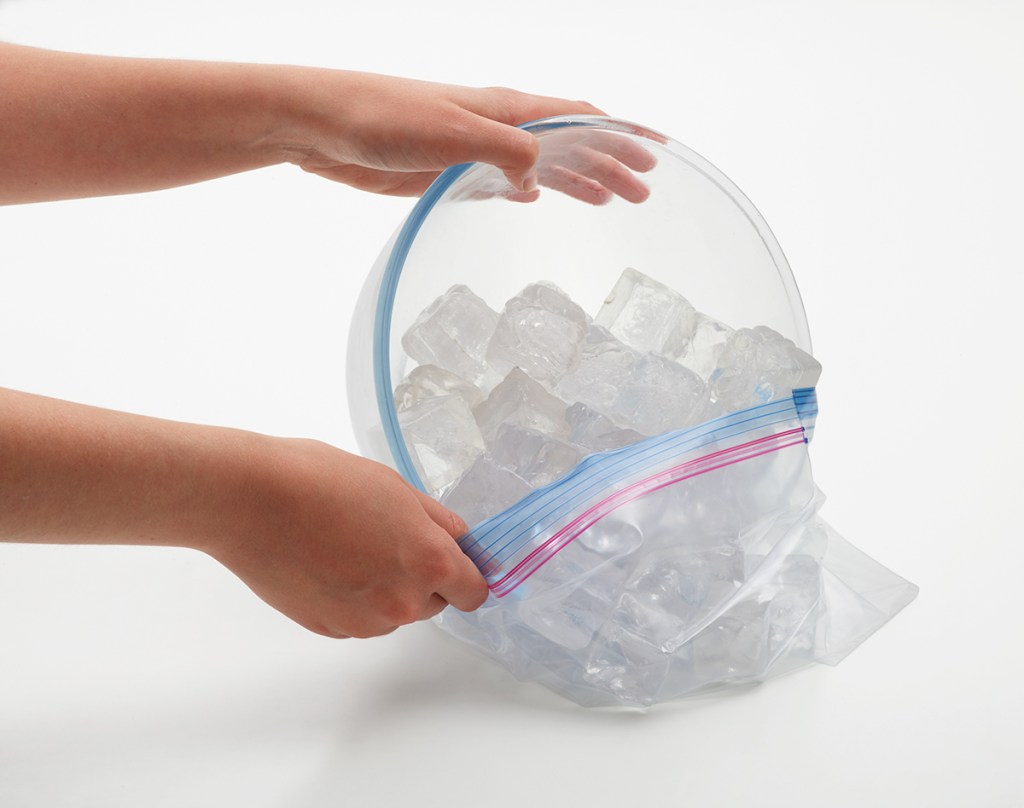
6. Fill the large ziplock bag with ice, then put your bag of ice-cream ingredients inside. The ice will start to draw heat from the milk and cream immediately, but it won’t take away enough heat to freeze the ice cream.
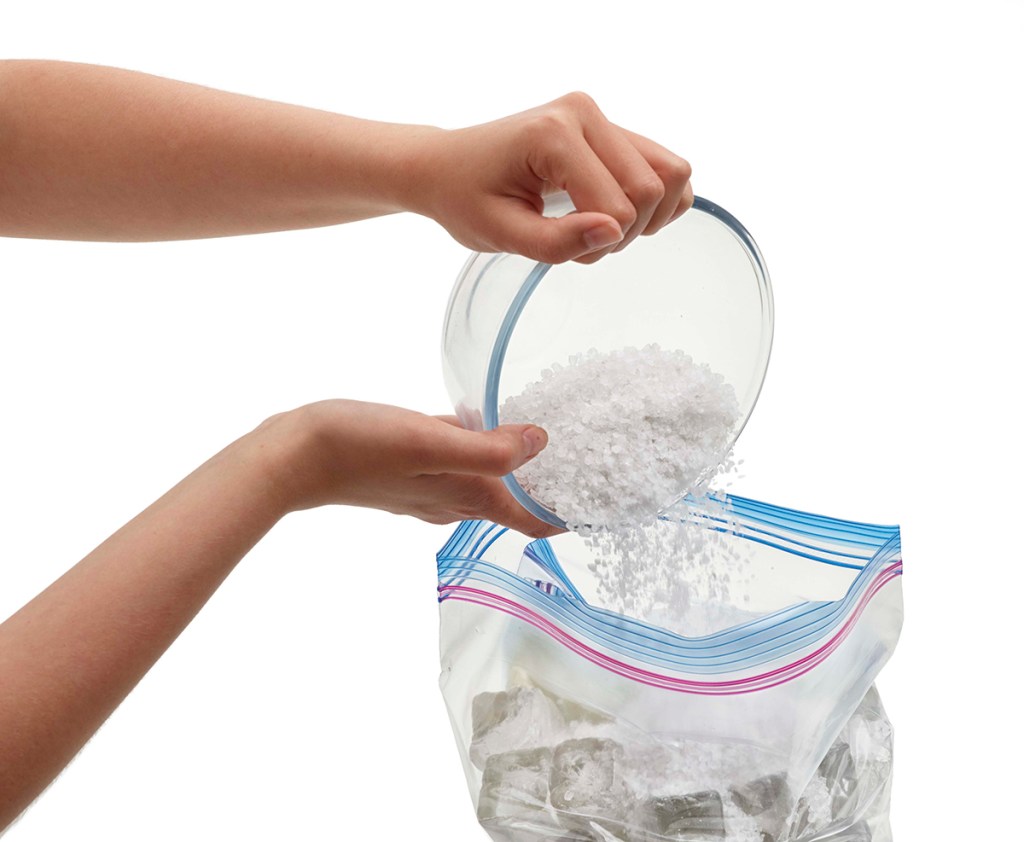
7. When your ice-cream mixture is nestled in among the ice, pour in the salt into the large bag with the ice and seal it. Putting salt into the bag causes the ice to draw much more heat away from the milk and cream. In fact, the temperature of the ice can drop to a chilly -6°F (-21°C), so be careful not to touch it.
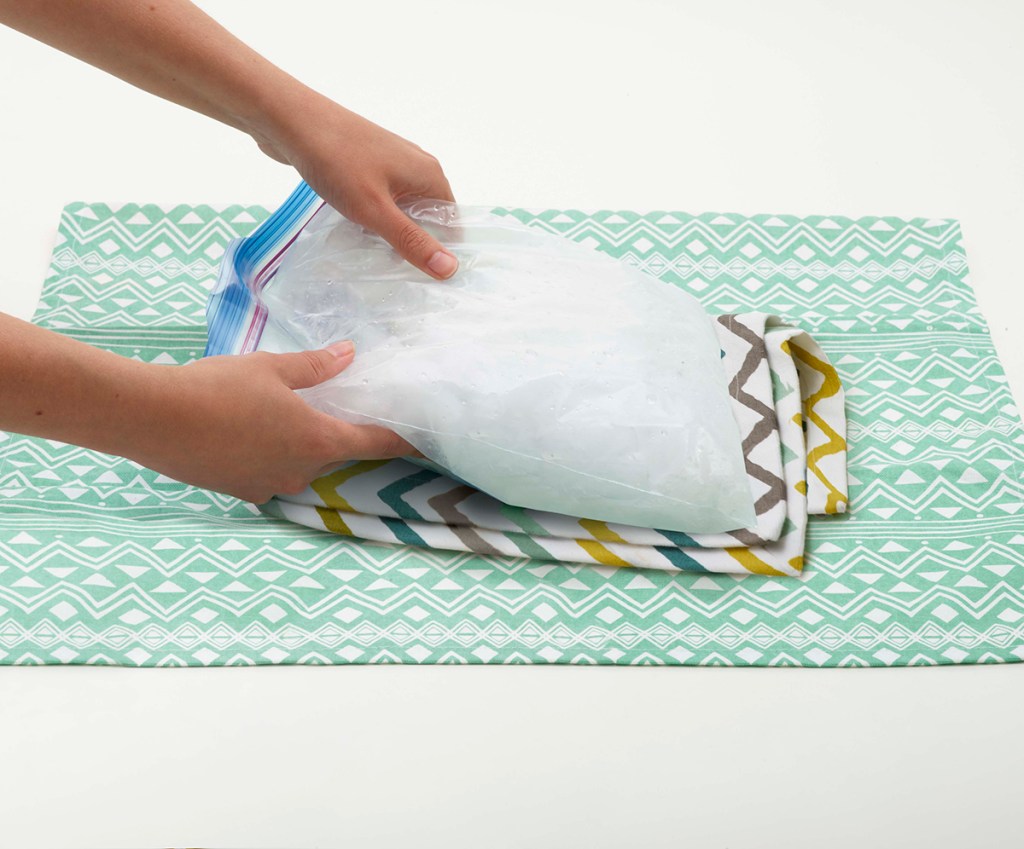
8. Wrap the bag in a double layer of dish towels like a package. This will protect your hands from getting too cold and make your ice-cream mixture easier to throw and catch, too.

9. Place the package into a plastic bag, keeping the dish towels tightly wrapped around the sealed bag of ice.
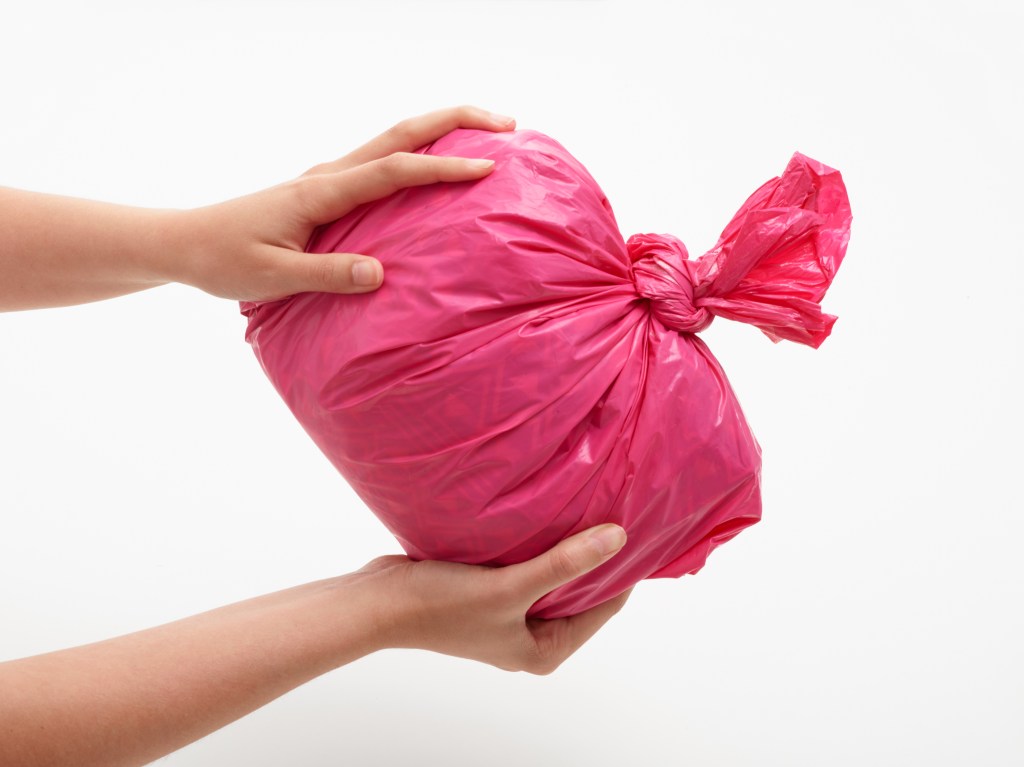
10. Tie a knot in the open end of the plastic bag, and then shake, massage, whirl, and throw the bag around for about 15 minutes. Keep the mixture moving while it cools, otherwise the ice crystals in the milk and cream will grow too large, and the ice cream won’t be smooth and creamy.
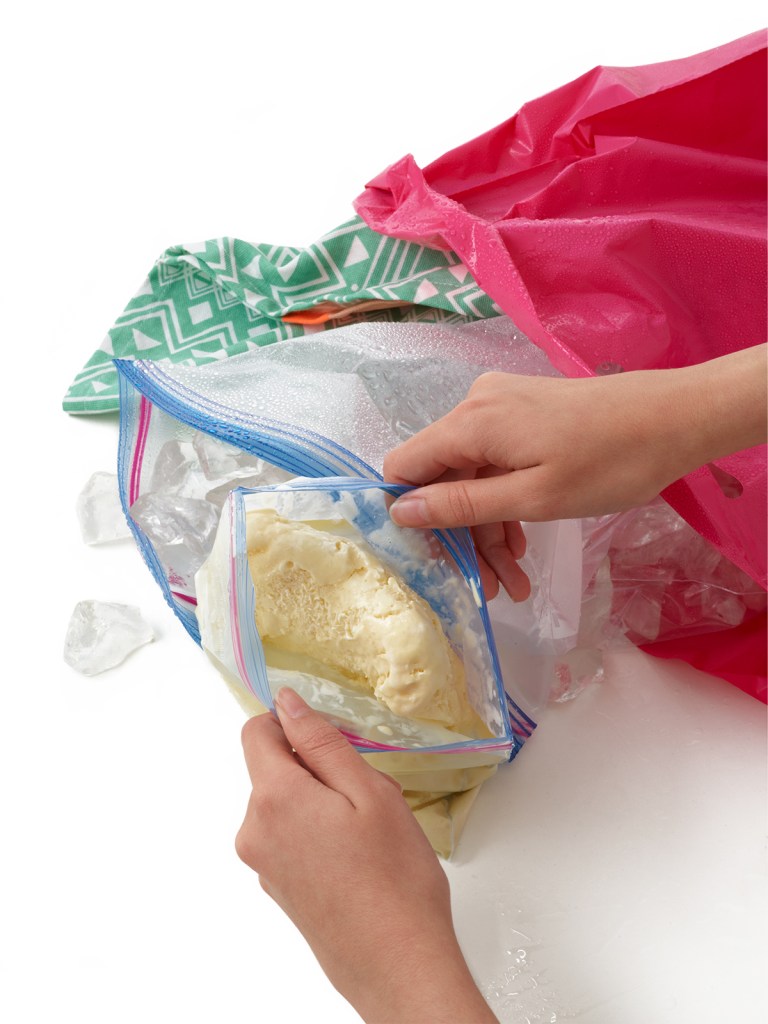
11. Wash your hands, then untie the plastic bag and unwrap the dish towels. Carefully unseal the large ziplock bag to avoid spilling any melted ice. Finally, take out the smaller zippered bags and open them to reveal your very own homemade ice cream!
More from Time Off


Share a Link
- Click the icon above to copy the url link to your clipboard.
- Paste the link into the location in which you share assignments with students. Examples might include, but are not limited to Canvas, Schoology and Edmodo.


Google Classroom
- Click on the icon above to share the article with a class in your Google Classroom.
- Choose an action. Options might include creating an assignment or asking a question.